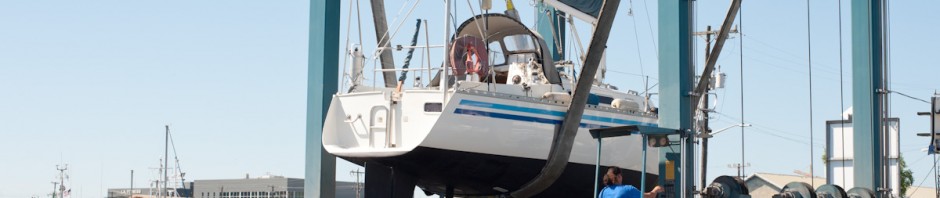
Before and After photos showing some of the work done April/May 2013 at Canal Boatyard in Seattle.
Click on a thumbnail below to see the full size image.
-
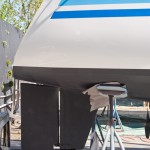
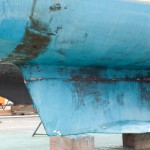
- Dirty, dull and needing bottom paint.
-
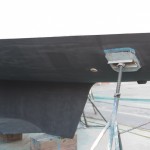
- Bottom painted, hull buffed, and prop serviced.
-
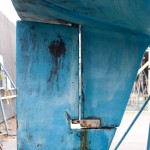
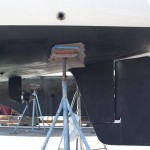
- Rudder in need of bottom paint.
-
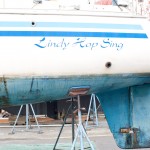
- Rudder painted and hull buffed. The old name and hailing port decals were removed in preparation for the new ones.
-
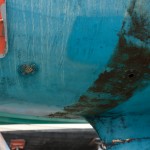
- Intake and outflow thru hulls for the head. Inside, these were controlled with Blakes seacocks, which is an older type of valve using tapered plugs. These are great seacocks that could be serviced and used for another 50 years. But I’m converting to a composting head and don’t need these thru hulls anymore. Thees thru hulls along with one in the galley were removed and completely sealed.
-
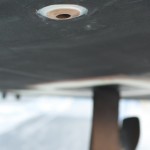
- Here’s the new thru hull for the galley sink drain. The boat started with five major thru hulls. All of them were sealed up and two new ones were created to drain the galley and head sinks. Eliminating holes in the bottom and especially removing the associated fixtures, valves and plumbing reduces future maintenance and risk of catastrophic failure.
-
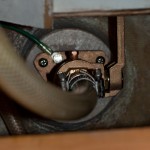
- Inside the boat there needs to be a valve to open or shut off the flow of water from each thru hull. This is the old inline valve for the galley drain. There is supposed to be a ball Inside the valve that rotates when the handle is turned–either allowing water to flow or blocking flow. The ball inside this valve had completely dissolved and there was no way to shut off water flow. Notice the single hose clamp and the red, plastic fitting… Code requires double clamping so that the failure of a $3 clamp won’t sink the boat. But this fitting was too short to take a second clamp and the entire setup was too frail to work on while in the water.
-
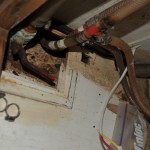
- A different angle of the galley drain valve showing the severe corrosion of the valve body and handle. With the valve failed open, that piece of red plastic and single hose clamp are all that’s keeping a lot of seawater outside the boat.
-
- Another corroded and inoperable inline valve where the ball had completely disappeared. The valve was removed and the hole sealed. It had served as an intake for the galley seawater pump and also T’d into the engine’s seawater cooling system.
-
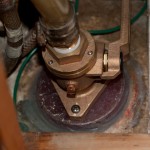
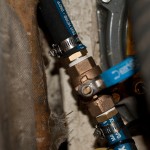
- New seacock for the galley drain mounted to reinforcing fiberglass donut. The donut is made from fiberglass stock and epoxied to the hull. The seacock itself is made by Groco of marine bronze and is heavy duty. The old inline valves were held in place by threading onto the mushroom head (the fitting visible on the exterior). This seacock also threads onto the mushroom fitting but is additionally held in place by stainless bolts attaching the flanges to the fiberglass donut. Very secure!
-
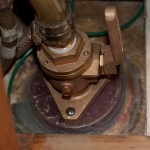
- A metal fitting attaches to the top of the new Groco seacock. The hose is double clamped per code.
-
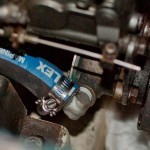
- New Groco seacock in the head (sink drain). The green wire bonds the seacock to a “Diver’s Dream” zinc to prevent galvanic corrosion–which is probably what caused the balls to dissolve in the old inline valves.
-
- Diver’s Dream zinc bonded to seacocks. This sacrificial zinc will protect the new Groco seacocks and fittings from galvanic corrosion. The zinc can be replaced easily in the water.
-
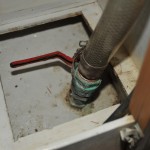
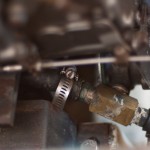
- The sail drive has a water intake for providing water to the engine cooling system. This valve opens and closes the water intake to allow servicing the water pump and other cooling system components. Despite some surface corrosion, the valve body is sound, though it’s also frozen open.
-
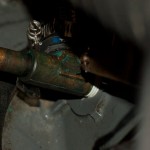
- A new valve had to be shipped from Japan but didn’t arrive in time. Rather than wait and pay additional yard fees, the old valve was serviced and reinstalled. But it still doesn’t shut off reliably.
-
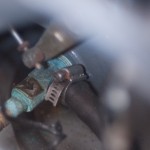
- We added an inline valve between the sail drive valve and the water pump to allow shutting off water and servicing the cooling system. Next time the boat is hauled for bottom paint (in a couple years) I’ll remove this extra valve and replace the sail drive valve.
-
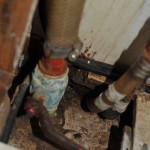
- Water pump had a T connector to draw water both from the sail drive intake and from a separate thru hull. Old hose was due for replacement.
-
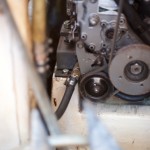
- Water pump (behind black pulley in center of photo) with a T for two intake connections. The second intake comes from the black hose leading forward and then up (left hand side) to connect to the vinyl hose that led over the engine compartment to the old galley intake thru hull. All this extra plumbing was eliminated along with the obviated galley intake thru hull.
-
- The T connector to the water pump was replaced with an elbow and the old hose was replaced with larger diameter, high-temperature hose. The extra thru hull was glassed in and was one of three thru hulls to be eliminated.
-
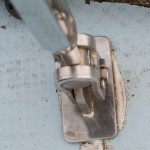
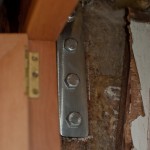
- Chain plates essentially hold up the mast. They are large metal strips that transfer forces on the sails and mast to the hull. The top of each chain plate protrudes through the deck and has a hole for attaching the stainless steel cables supporting the mast. A small deckplate is supposed to seal the deck and prevent water from reaching the chain plate. Here is a previous owner’s desperate and futile attempt to seal the chain plate deck fitting.
-
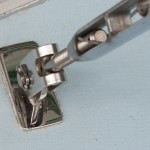
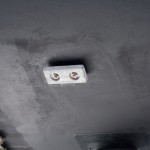
- New chain plate and deck fitting. Neat, clean and, most importantly, tightly sealed!
-
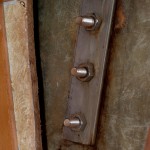
- Old chain plates showed signs of rust–not surprising considering condition of the deck plate seals.
-
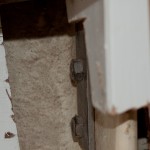
- Old chain plates were installed awkwardly with nuts on the chain plate and bolts on the backing plate.
-
- New chain plate. The chain plates had been hidden behind built-in cabinetry. To access them some cabinet sidewalls had to be cut away. I’ll leave them open for easy monitoring.
-
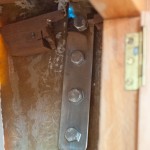
- Bolts oriented correctly.
-
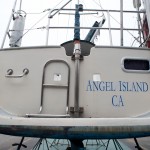
- Transom with mismatched paint color and cracked and damaged fiberglass. Few 30′ sailboats have a swim scoop like this and it was unfortunate that one of the boat’s more unique and visible features was also an eyesore.
-
- Cracks and damage repaired and transom painted to color-match the rest of the hull. From eyesore to prettiest part of the hull!
-
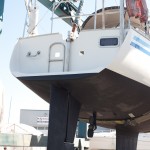
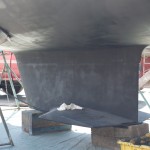
- Wing keel and bottom needed paint!
-
- New thru hull in head, bottom painted, and hull buffed.
-
- Happy bottom! Every irregularity in the bottom creates drag. Various changes contributed to a much smoother bottom. These include: sealing three thru hulls; eliminating the wood frame around the sail drive and repairing the rubber boot; and removing an unused cathodic system. Of course new bottom paint helps too.
-
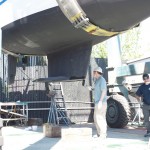
- Touching up bottom paint after lifting the boat off the blocks.
-

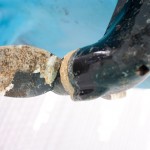
- The prop, prop zinc and sail drive boot were in bad shape. Somehow, someone thought screwing wood slats into the rubber was a good idea. Also there was a decommissioned cathodic system (small dome to the left of the boot) just taking up space.
-
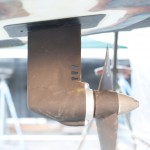
- Prop zinc was done and the prop itself needed some serious attention.
-
- Prop was sand blasted and painted with several protective coatings.
-
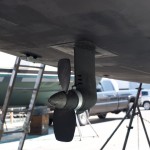
- New prop zinc should minimize additional pitting.
-
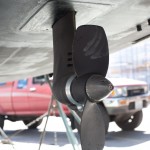
- New rubber boot is flush. Unused cathodic system removed and holes glassed in.