Rerouting hoses around the galley sink is a prerequisite for the larger project of replacing Failed Seacocks.
 The seacock in worst condition is beneath the galley sink and serves as the sink discharge. It is also the most problematic in terms of access. In addition to being tucked away in a corner of the cabinet, there are five hoses that either touch or run within a couple inches of the fixture. None of the other seacocks has nearly this much corrosion and they also don’t have hoses touching them. My guess is that this is not galvanic corrosion but rather the result of constant contact with moisture condensing or sweating through the hoses. The effects are far worse on the steel valve handle. In addition to causing rust and making access difficult, the hoses leave no room for a backing plate to go with the new seacock. The backing plate will be a donut-like disc about 6″ in diameter and 3/4″ thick. It will be epoxyed to the hull so that the thru-hull passes through its center and the flange from the new seacock bolts onto it. The goal is to reroute hoses so that there is at least 3″ of clearance surrounding the seacock.
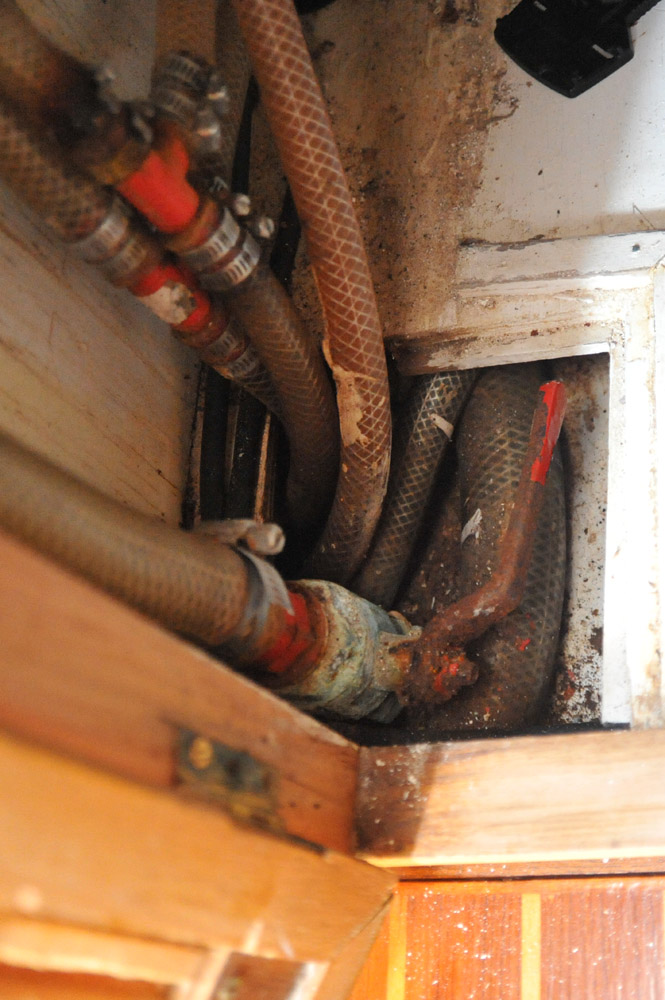
 The worst offenders are the large and small bilge hoses (two hoses on the right) along with the main water line (far left). All three touch the seacock before exiting through the cabinet corner and leading forward through the bilge. The remaining two hoses supply hot and cold water to the sink in the head. These two hoses exit through the cabinet side and run underneath the floor of a shallow compartment in front of the engine compartment. Removing the floor stringer and feeling through the crack, there seems to be room underneath that little “tween” compartment floor for all the hoses. So step one is cutting out the floor of the tween compartment.
Cutting away the floor under the tween compartment reveals a nice juicy space for running all the hoses and perhaps later routing electrical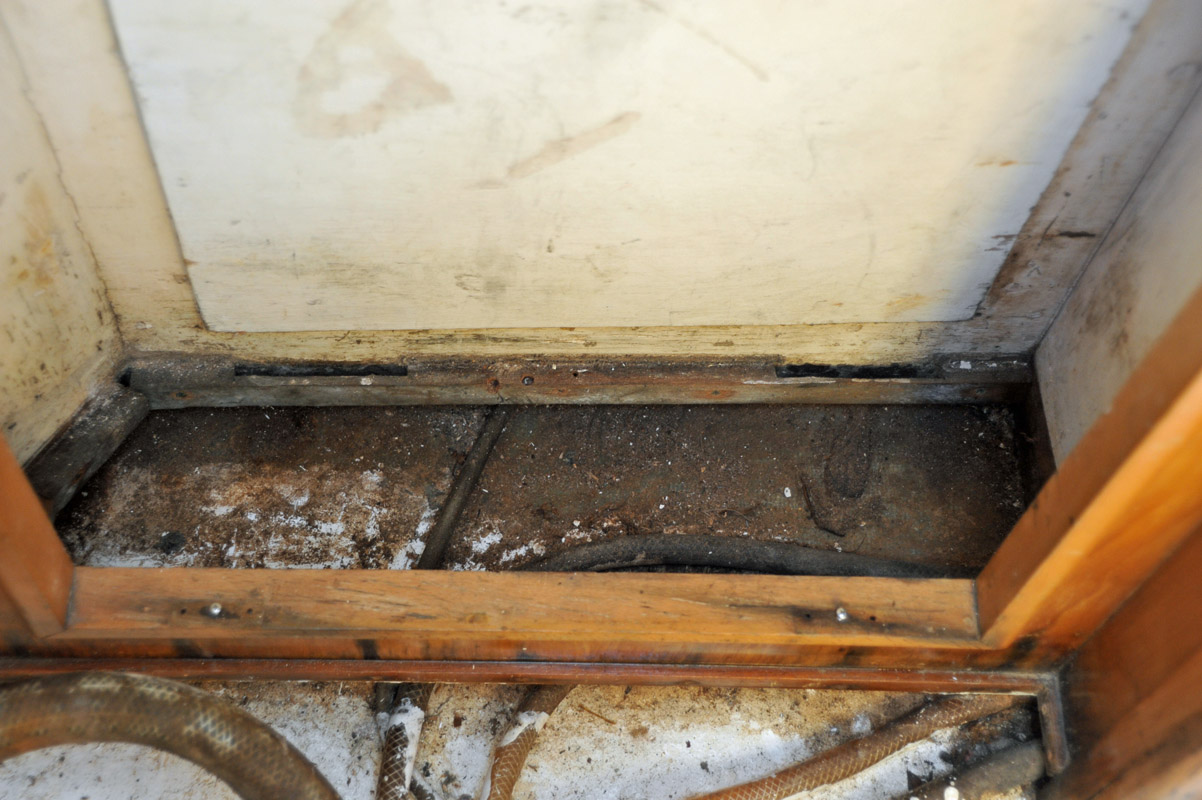 lines as well. To cut out the floor I first drilled holes forming a small 1″ square. Then I used a Fein Multimaster to connect the dots, cutting out a small piece of the floor. After making sure there were no hoses, wires or other things in the way I cut out the rest of the floor with the Multimaster. What an incredibly handy tool, although the cost of replacement blades is steep.
Next I cut a hole in the tween compartment through the side of the cabinet for the bilge 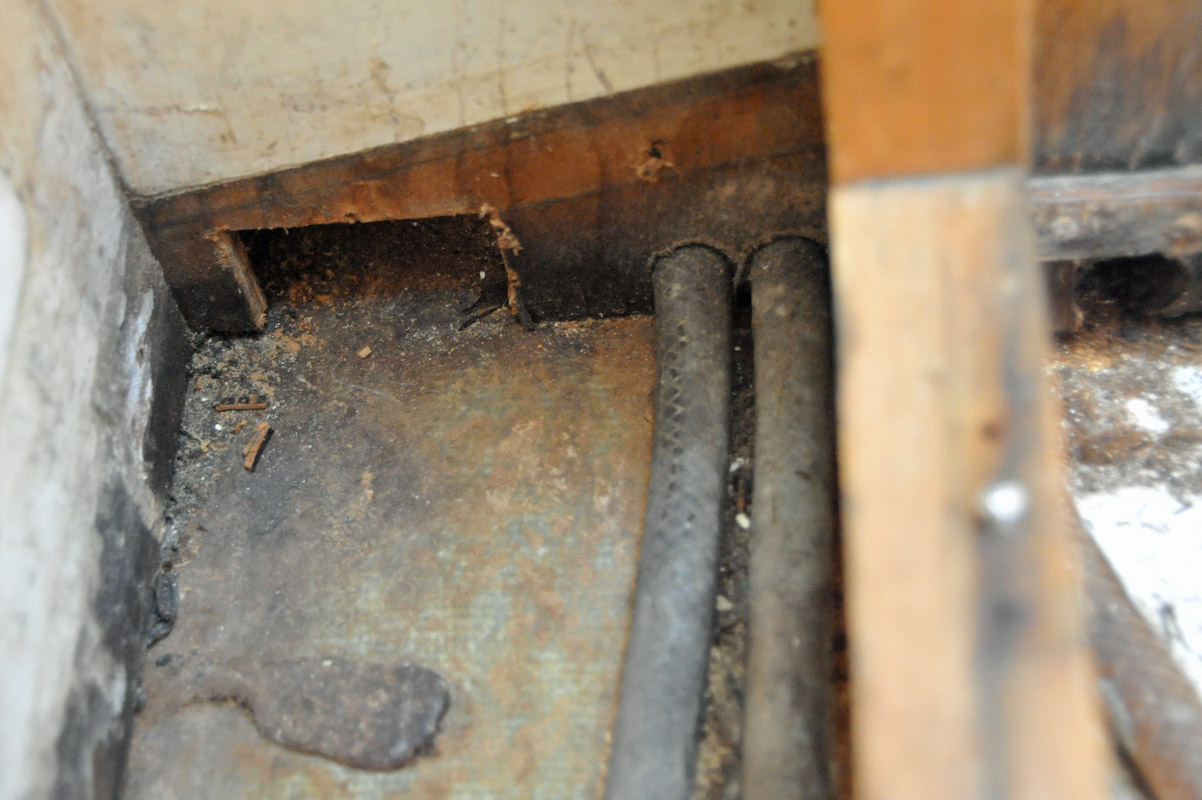 hoses and main water line. The hole is tall enough for the large bilge hose and two of the smaller ones can fit, one on top of the other. I’ll have to figure out what, if anything, is needed to prevent movement and chafe. In the photo, the empty hole at far right lines up with seacock. By moving hoses to the new hole they are moving about 7″ back and leaving plenty of room for a new backing plate. At this point I have gotten over the psychological barrier to cutting into the woodwork. That made the work very slow going until now but the pace is increasing. I’m spending time deciding the best placement for new holes rather than steeling myself up for cutting.
With the hoses entering further back inside the cabinet, they are now underneath the 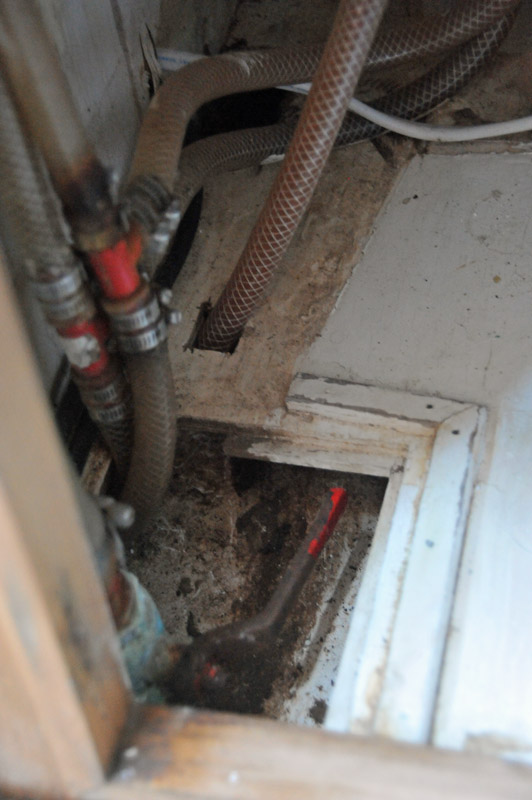 cabinet floor. The water main needs to pass through the floor on its way aft to the bulkhead and water pump so it gets a new hole. The two bilge hoses already have a path underneath the cabinet floor and an exit hole a little further back. Fortunately, this portion of the cabinet is normally concealed by panels. The photo clearly shows the difference in paint between the exposed and hidden portions. Note how much nicer the area around the seacock looks without the three the hoses abutting.
This is where I am leaving things for the day. Next time I’ll decide if the remaining hoses, the hot and cold water lines, need to be moved back as well. I’ll also plan ahead and decide what else can be cut out if more space is needed around the seacock for better access or installation of the new backing plate.