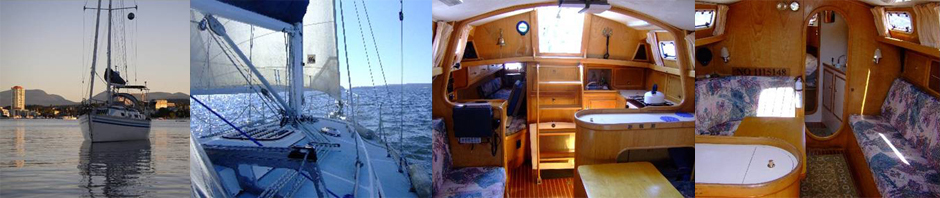
Access port with new hardware and gasket
Czardas has a pressurized freshwater system that includes three stainless steel water tanks. The main tank is close to 40 gallons and is mounted atop the fuel tank in the stern. The other two tanks are 20 gallons each and located in the cabin underneath the settees. Fortunately there are valves to allow selecting each tank individually. For reasons of expediency, I decided to ignore the stern tank and focus on the two smaller ones in the cabin. The stern tank is isolated and it will remain so until there’s time to clean it as well.
The usual process for cleaning tanks is to inspect and clean every part of the system starting with deck fills and ending at the taps. All three tanks make this difficult by having hose ports in inaccessible locations. The stern tank itself is built like the fuel tank with a side access port. Its internal baffles probably make it impossible to see or reach most the interior.
The cabin tanks have an access port on top, a hole 6 inches in diameter. The port is kept sealed by means of a thick stainless cover plate compressing a rubber gasket against the top of the tank. Six through bolts hold everything together. Apparently the starboard gasket wasn’t doing the job and caulking had been applied liberally.
Removing the cover plates was a little tricky. A couple of bolts turned with the nuts when I tried to loosen them. One had to be cut off using a Fein Multimaster and stainless steel does not cut easily. The through bolts were held in place by small beads of metal brazed into the holes. The idea sort of worked–it kept the bolts in place vertically, preventing them from falling down into the tank as the gasket, cover, and nuts were applied from above. However it did not prevent the bolts from turning when the nuts were being tightened or loosened.
With ports open and the tank interiors revealed, it was apparent they were in dire need of cleaning. The inner walls were solid brown from a coating of rust, algae, and who-knows-what. Wendy volunteered to scrub the interiors. Scrubbing involved inserting an arm up to her shoulder into the 6″ opening of each tank and reaching around baffles and impossible angles to use a scrubber sponge on every part of the interior. The process took hours and cost Wendy some bruises from scraping her arms along the edges of metal. She did a fantastic job and when finished the tank surface was clean stainless. To polish the surface we pressure washed by reaching inside with a hose and spray nozzle.
Buna nitrile gasket cut with an Exacto knife
I wanted to improve on sealing the access ports so that they wouldn’t leak and would be easier to open and close. I got a scrap of 3/16″ buna nitrile gasket material and using an Exacto knife cut discs the size of the metal covers. I cut out the centers turning them into rings and then drilled holes that lined up with the bolt holes in the cover plates. I learned that’s not a good way to make holes in rubber and later obtained a set of punches that did a much better job.
The stainless sheet metal around the access ports had become bent while removing the old bolts. I flattened the metal by using a C clamp, tightening it spot by by spot around the perimeter of the hole until the top was essentially flat. Because of the brazes, using the same size hardware would have caused the metal to bend again so I stepped down in size from metric 6 to new #10 stainless hardware. These bolts fit through the holes without touching the brazing.

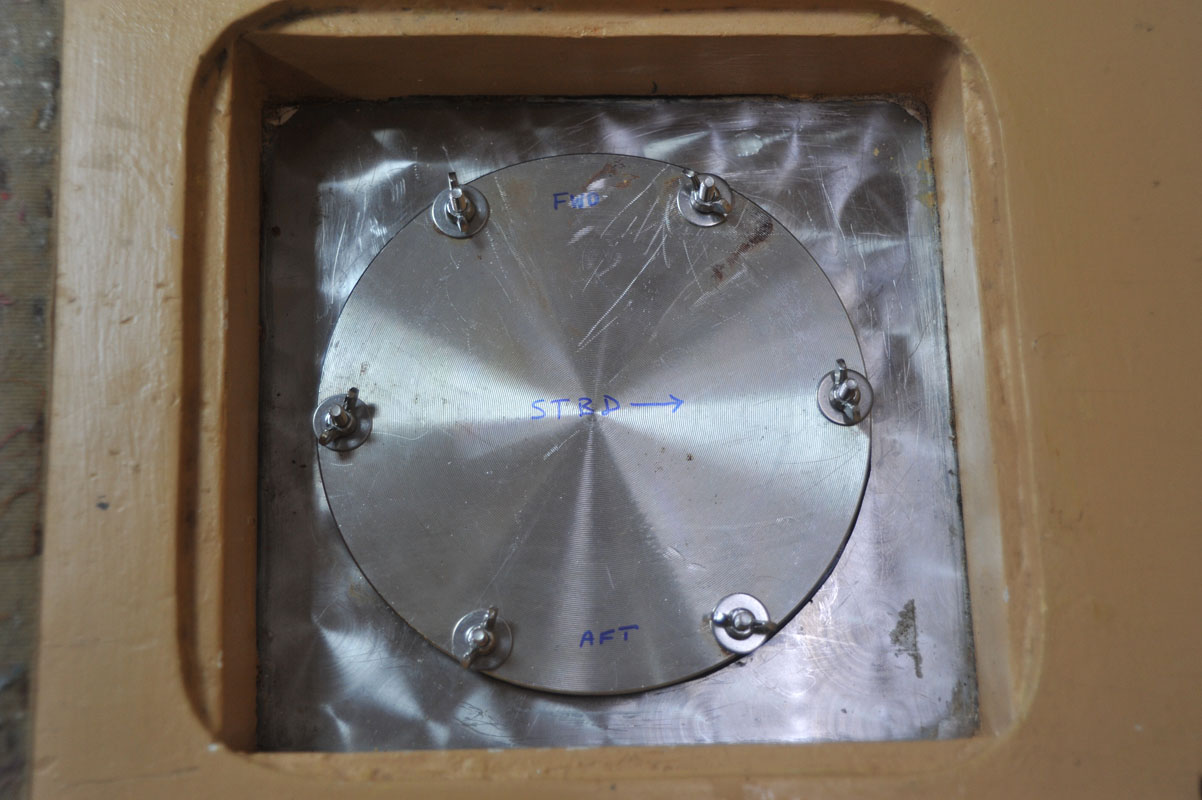
Bolts with fender washers "Welded" to underside of tank top
I used J.B. Weld Marine Weld to affix #10 hex bolts and fender washers to the underside of the tank top so that they would not fall through or turn when turning the nuts from above. Holding the bolts in place while the J.B. Weld cured was a trick. Since J.B. Weld does not bond to rubber I punched holes in scraps of buna nitrile and slid each scrap over the bolt end protruding upwards. This held the bolts in place long enough to apply Weld to all six bolts and washers and tighten down the metal cover. The rubber also prevented the cover from accidentally getting “Welded” to the tank. The next day I removed the cover and rubber spacers and the bolts were set in place as hoped.
The next step was sanitizing the tanks. I followed directions gleaned from several online forums. Fill the tanks with a water-bleach solution, let sit overnight, drain, and flush. The recipe calls for somewhere between four ounces of bleach per 10 gallons up to an ounce per gallon. I aimed for the middle and used 12 ounces of bleach in 19+ gallons of water. I ran faucets until I smelled bleach so that the bleach would sit in the lines and fixtures. The next day I ran faucets until the tanks were empty.
Up to this point I had filled tanks through the open access ports. The first time I filled through the deck fills, some gunk in the fill lines ran into the tanks. I ended up pouring a small amount of bleach into the deck fills followed by lots of water. Several more cycles of fill/flush followed until water could fill the tanks and remain completely clear. To make sure nothing unwanted could run into the tanks I got new screw-on caps for the deck fills and ordered spare O rings to fit the caps.
The final step was cleaning the water pump filter. That was simply a matter of unscrewing the clear plastic top of the PumpGard, removing the screen, rinsing it, and replacing everything. It was a gratifying task since the screen was completely coated by a disgusting rust colored layer of particles and growth. It came perfectly clean by brushing it with a tooth brush in a bucket of water.
The boat now has clean water for washing and drinking–the last of the absolutely essential services needing work. The improved port covers make the tanks more accessible, facilitating regular maintenance and probably a lot less effort to keep clean.